
Request Your Virtual Consultation
Virtual Orthodontic Consultations Explained
Considering orthodontic treatment but not sure where to start? Look no further.
A virtual orthodontic consultation with Langley Orthodontics is your easy first step toward a healthier smile. Connect online with one of our orthodontists for a preliminary assessment of your smile and personalized treatment advice.
It's the ideal solution for busy schedules or if you're exploring whether orthodontics is right for you, allowing you to discuss options without an in-person commitment. Plus, there is absolutely no obligation to proceed!

Virtual Consultation Steps
Just provide your contact information and some pictures, and our team will schedule a virtual meeting with one of our orthodontists.
1. Capture Your Smile
To help our team, please take eight photos of your smile. For the best results, we recommend standing in front of a window or using bright lighting. You'll find examples below to guide you.
2. Complete the Form
Once you've captured your photos, please complete the consultation request form provided below. Be sure to include all your contact details and attach the images of your smile you just took.
3. Meet Your Orthodontist
Next, you'll connect with your orthodontist during an online consultation. You can share your smile goals and express any concerns while your orthodontist assesses your photos and outlines a treatment plan.
4. Begin Your Smile Journey
Your next step is an in-person appointment at our office. This visit is important for confirming the details of your treatment plan, finalizing financial details, and gathering any necessary records.
- Image 1 - Centre Smile
- Image 2 - Upper Arch
- Image 3 - Lower Arch
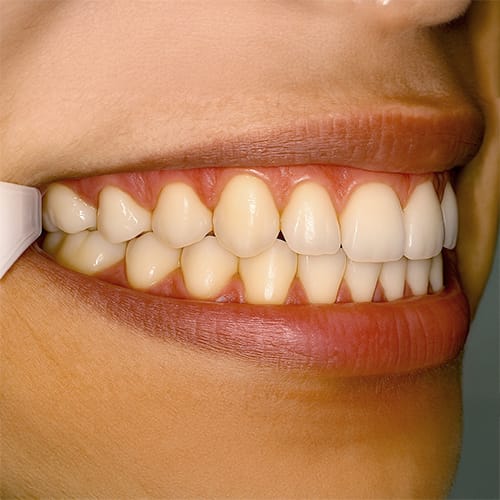
- Image 4 - Left Bite
- Image 5 - Right Bite
- Image 6 - Smile Portrait
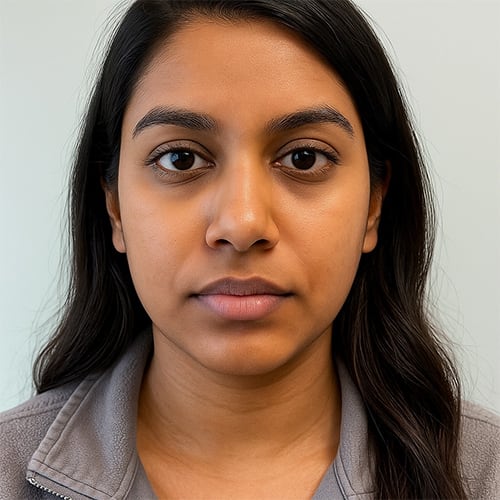
- Image 7 - Neutral Portrait
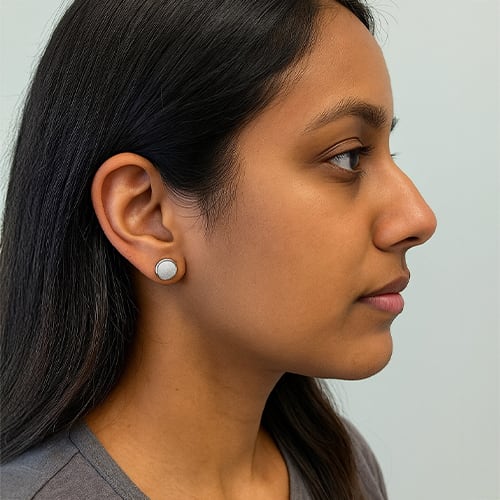
- Image 8 - Profile Portrait
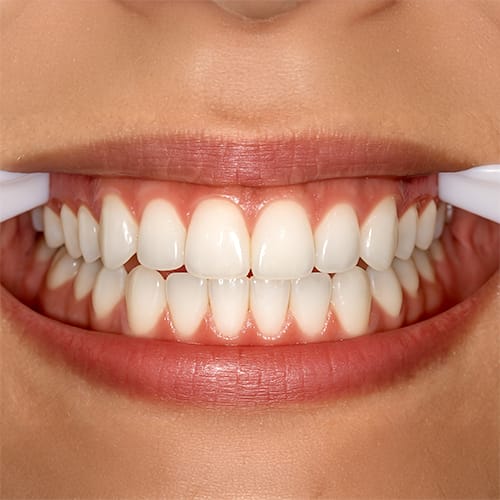
First, bite down gently with your back teeth together. Next, give us your widest smile, aiming to show all your teeth. Finally, take a photo straight-on of your smile.
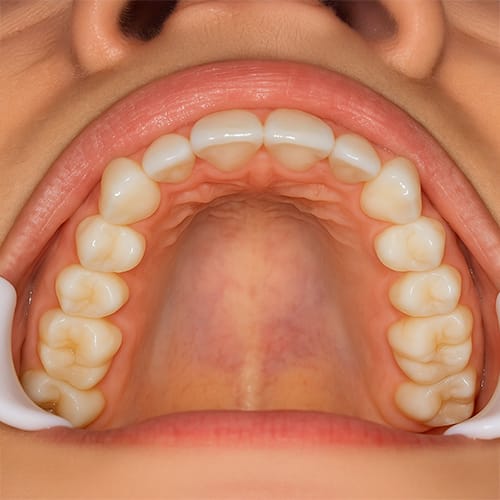
To ensure clear photos, try to face a window or use a flashlight to illuminate the inside of your mouth. Gently tilt your head back and aim to capture the full upper arch of your teeth in the photo.
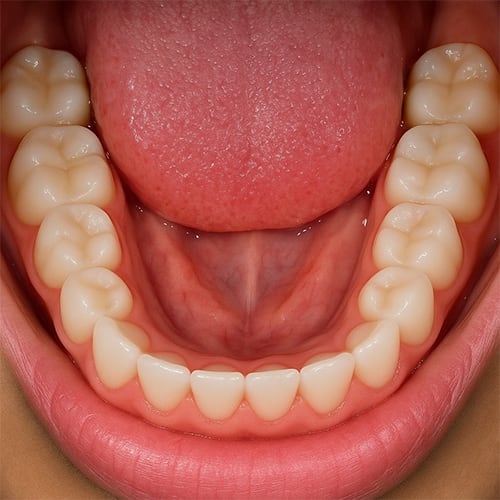
For best results, position yourself facing natural light or use a flashlight to brighten your mouth. Tilt your head forward slightly and take a clear photo that shows the entire lower arch of your teeth.
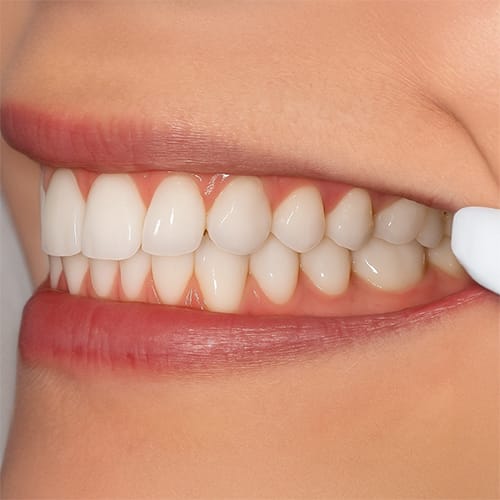
Bite down naturally, making sure your back teeth are in contact. Use a clean finger to gently pull your left cheek back as far as possible. Then, take a photo from the side, directly next to your mouth.
Bite down normally, ensuring your back teeth are fully touching. Gently pull your right cheek back as far as you can. Take a clear photo from the side, directly in line with your teeth.

Stand in a well-lit area, face the camera directly, and take a clear photo of your entire face while showing a big, natural smile.
In a bright, well-lit area, take a front-facing headshot while maintaining a calm, neutral expression.
In a well-lit area, turn to the side so your full profile is facing the camera. Keep a relaxed, neutral expression and take a clear photo that captures your entire side view.
-
Image 1 - Centre Smile
First, bite down gently with your back teeth together. Next, give us your widest smile, aiming to show all your teeth. Finally, take a photo straight-on of your smile.
-
Image 2 - Upper Arch
To ensure clear photos, try to face a window or use a flashlight to illuminate the inside of your mouth. Gently tilt your head back and aim to capture the full upper arch of your teeth in the photo.
-
Image 3 - Lower Arch
For best results, position yourself facing natural light or use a flashlight to brighten your mouth. Tilt your head forward slightly and take a clear photo that shows the entire lower arch of your teeth.
-
Image 4 - Left Bite
Bite down naturally, making sure your back teeth are in contact. Use a clean finger to gently pull your left cheek back as far as possible. Then, take a photo from the side, directly next to your mouth.
-
Image 5 - Right Bite
Bite down normally, ensuring your back teeth are fully touching. Gently pull your right cheek back as far as you can. Take a clear photo from the side, directly in line with your teeth.
-
Image 6 - Smile Portrait
Stand in a well-lit area, face the camera directly, and take a clear photo of your entire face while showing a big, natural smile.
-
Image 7 - Neutral Portrait
In a bright, well-lit area, take a front-facing headshot while maintaining a calm, neutral expression.
-
Image 8 - Profile Portrait
In a well-lit area, turn to the side so your full profile is facing the camera. Keep a relaxed, neutral expression and take a clear photo that captures your entire side view.
Begin Your Virtual Consultation
Fill out the form below and our team will schedule your virtual consultation.
Including photos of your smile is highly encouraged. While not mandatory, these images allow us to get a preliminary understanding of your orthodontic needs.